机器配置
- Supermicro7048GR-TR
E5-2680v4 x2(14c x2 total 56 threads)- 后期更换为E5-2686v4 x2(18c x2 total 72 threads)
- DDR4 ECC 512g 运行在2133
- RTX3080 20G x1
- 整体费用约为9000人民币
测试内容(新,V0.3,250502更新)
测试结果:
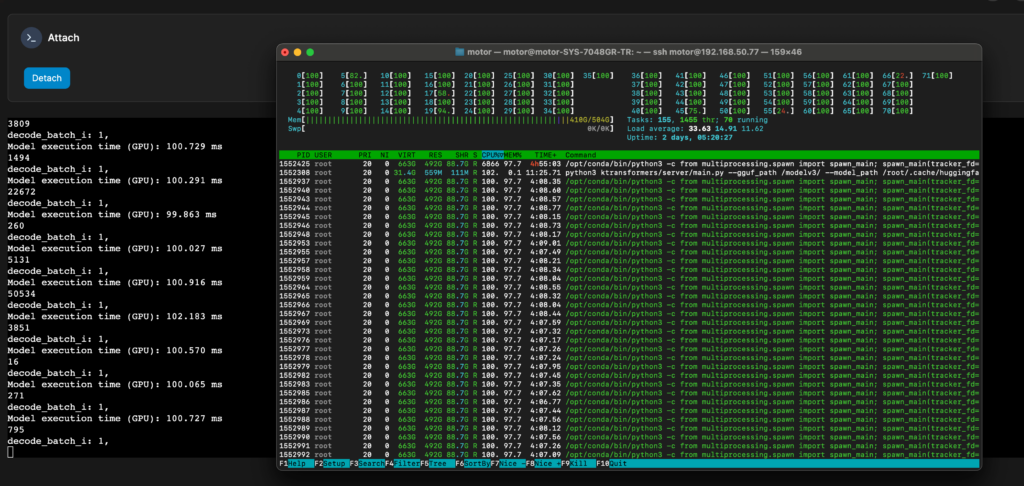
- 新测试Qwen3 unsloth/Qwen3-235B-A22B的UD-Q4_K_XL:prefill平均23token/s,decode平均8.3token/s
- V3-0324,unsloth的UD_Q2_K_XL:prefill平均30token/s,decode平均9.6token/s,与0.2.4一致,相比023有一定的提升
安装方式:
与0.2.4一致,按照官方dockerfile一步步来,目前问题是报错torch版本兼容性问题(dockerfile安装方式会自动升级到2.7但使用时报错),需要降级到2.5.1。另外model_path的问题仍未解决,和0.2.4一样需要手动指定绝对路径。
启动参数:
TORCH_CUDA_ARCH_LIST="8.6" USE_NUMA=1 python3 ktransformers/server/main.py \
    --gguf_path /modelv3_new/ \
    --model_path /root/.cache/huggingface/hub/models--Qwen--Qwen3-235B-A22B/snapshots/b51c4308ed84804fa6722b20722cd91e3cd17808 \
    --model_name Qwen3Moe \
    --architectures Qwen3MoeForCausalLM \
    --cpu_infer 56 \
    --max_new_tokens 4096 \
    --cache_lens 16384 \
    --temperature 0.3 \
    --cache_8bit true \
    --optimize_config_path ktransformers/optimize/optimize_rules/Qwen3Moe-serve.yaml \
    --chunk_size 256 \
    --max_batch_size 4 \
    --backend_type balance_serve \
    --host 0.0.0.0 \
    --port 8080
测试内容(V0.2.4,250405更新)
测试结果:
- V3-0324,unsloth的UD_Q2_K_XL:prefill平均30token/s,decode平均9.6token/s,相比023有一定的提升
- 关于如何设置参数,如何优化新能,有一些疑问仍在探讨,可在此issue跟进,大致是cpu_infer对推理速度有较大影响需要多次测试判断什么数值最合适。
| Setup | Performance |
|---|---|
| USE_NUMA=1, HT on, cpu_infer=56 | 9.65 token/s |
| USE_NUMA=1, HT on, cpu_infer=42 | 9.54 token/s |
| USE_NUMA=1, HT on, cpu_infer=36 | 9.45 token/s |
| USE_NUMA=1, HT on, cpu_infer=68 | 9.25 token/s |
| USE_NUMA not set, HT on, cpu_infer=68 | 8.2 token/s |
| USE_NUMA not set, HT on, cpu_infer=36 | 7.3 token/s |
| USE_NUMA not set, HT off, cpu_infer=34 | 6.8 token/s |
| USE_NUMA=1, HT off, cpu_infer=34 | 6.5 token/s (Needs Validation) |
docker compose 配置:
services:
  deepseek:
    image: pytorch/pytorch:2.5.1-cuda12.1-cudnn9-devel
    runtime: nvidia
    container_name: deepseek
    privileged: true
    environment:
      - NVIDIA_VISIBLE_DEVICES=2 # 注意,privileged:true是为了启用USE_NUMA,但会导致此项失效。未开启USE_NUMA时,我通过此项单独指定显卡2
    volumes:
      - /home/motor/disk1/dsr1:/modelr1 # 映射存储模型gguf的文件夹
      - /home/motor/disk1/DSv3:/modelv3
      - /home/motor/disk1/dsv3_new:/modelv3_new
      - ./workspace:/workspace
    ipc: host
    ports:
      - "19434:8080"
    stdin_open: true
    tty: true
配置+编译步骤:
直接参考了官方dockerfile,但有所改动(我启用了USE_NUMA=1)
cd /workspace

export CPU_INSTRUCT=NATIVE
export CUDA_HOME=/usr/local/cuda
export MAX_JOBS=64
# 需要根据你机器的线程数设置,我的是72线程
export CMAKE_BUILD_PARALLEL_LEVEL=64
# 需要根据你机器的线程数设置,我的是72线程
# Find your GPU ARCH here: `nvidia-smi --query-gpu=compute_cap --format=csv`
# This example is for my RTX2080ti + RTX 3080
export TORCH_CUDA_ARCH_LIST="7.5;8.6"

apt update -y

apt install -y --no-install-recommends \
    libtbb-dev \
    libssl-dev \
    libcurl4-openssl-dev \
    libaio1 \
    libaio-dev \
    libfmt-dev \
    libgflags-dev \
    zlib1g-dev \
    patchelf \
    git \
    wget \
    vim \
    gcc \
    g++ \
    cmake \
    libnuma-dev

git clone https://github.com/kvcache-ai/ktransformers.git

rm -rf /var/lib/apt/lists/*

cd /workspace/ktransformers

git submodule update --init --recursive

# git checkout a5608dc # 目前最新版有编译失败问题,checkout a5608dc(0.2.4post1)后能正常完成编译

pip install --upgrade pip

pip install ninja pyproject numpy cpufeature aiohttp zmq openai

pip install flash-attn

# 安装 ktransformers 本体(启用了USE_NUMA,含编译)
CPU_INSTRUCT=${CPU_INSTRUCT} \
    USE_BALANCE_SERVE=1 \
    USE_NUMA=1 \
    KTRANSFORMERS_FORCE_BUILD=TRUE \
    TORCH_CUDA_ARCH_LIST="7.5;8.6" \
    pip install . --no-build-isolation --verbose

pip install third_party/custom_flashinfer/
# 清理 pip 缓存
pip cache purge

# 拷贝 C++ 运行时库
RUN cp /usr/lib/x86_64-linux-gnu/libstdc++.so.6 /opt/conda/lib/
运行:
首先关闭swap避免内容被部分load到swap
sudo swapoff -a注意:目前版本可能存在加载模型config卡住问题,解决方法为直接指定模型config文件的绝对路径。具体问题跟进请关注此issue。
# V3
TORCH_CUDA_ARCH_LIST="8.6" USE_NUMA=1 python3 ktransformers/server/main.py \
    --gguf_path /modelv3/ \
    --model_path /root/.cache/huggingface/hub/models--deepseek-ai--DeepSeek-V3-0324/snapshots/e9b33add76883f293d6bf61f6bd89b497e80e335 \
    --model_name DeespSeek-V3-0324 \
    --cpu_infer 56 \
    --max_new_tokens 4096 \
    --cache_lens 16384 \
    --temperature 0.3 \
    --cache_8bit true \
    --optimize_config_path ktransformers/optimize/optimize_rules/DeepSeek-V3-Chat-serve.yaml \
    --chunk_size 256 \
    --max_batch_size 4 \
    --backend_type balance_serve \
    --host 0.0.0.0 \
    --port 8080

# R1
TORCH_CUDA_ARCH_LIST="8.6" USE_NUMA=1 python3 ktransformers/server/main.py \
    --gguf_path /modelr1/ \
    --model_path /root/.cache/huggingface/hub/models--deepseek-ai--DeepSeek-R1/snapshots/56d4cbbb4d29f4355bab4b9a39ccb717a14ad5ad \
    --model_name DeespSeek-R1 \
    --cpu_infer 56 \
    --max_new_tokens 4096 \
    --cache_lens 16384 \
    --temperature 0.3 \
    --cache_8bit true \
    --optimize_config_path ktransformers/optimize/optimize_rules/DeepSeek-V3-Chat-serve.yaml \
    --chunk_size 256 \
    --max_batch_size 4 \
    --backend_type balance_serve \
    --host 0.0.0.0 \
--port 8080运行DeepSeek-V3-0324的推荐设置参考这篇Unsloth的文档
测试内容(老,V0.2.3)
配置指南参考的这个,版本0.2.3,采用docker+container toolkit配置:https://github.com/ubergarm/r1-ktransformers-guide
待测试:更新到最新版0.2.4并设置export USE_NUMA=1,参考:https://github.com/kvcache-ai/ktransformers/issues/769
测试模型:unsloth的2.51bit动态量化版。
输出速度测试历史:
- 不启用Flashinfer(https://www.bilibili.com/video/BV15hQHYXEJc):平均4.7Token/s
- 启用Flashinfer:平均5.0Token/s
- 启用Flashinfer,启动命令中–cpu_infer 16改为28,平均5.3Token/s
- 启用Flashinfer,更换两颗cpu为2686v4,–cpu_infer 改为34,平均6.0Token/s
- 禁用Flashinfer重新使用Triton,更换两颗cpu为2686v4,–cpu_infer 改为34,删除 `PYTORCH_CUDA_ALLOC_CONF=expandable_segments:True` 的启动参数,平均6.5Token/s
Docker compose配置:
services:
  deepseek:
    image: nvidia/cuda:12.6.3-cudnn-devel-ubuntu22.04
    runtime: nvidia
    container_name: deepseek
    environment:
      - NVIDIA_VISIBLE_DEVICES=2 # My RTX3080
    volumes:
      - ./model:/model
      - ./workspace:/workspace
    shm_size: '310g'  # shared memory size
    ports:
      - "18434:8080"
    stdin_open: true
tty: true安装命令(参考):
apt-get update
apt-get install git -y
apt install curl -y
apt-get install build-essential cmake
curl -LsSf https://astral.sh/uv/install.sh | sh

# reopen terminal after uv installation

cd workspace
git clone https://github.com/kvcache-ai/ktransformers.git
cd ktransformers
git submodule init # submodule "third_party/llama.cpp", [submodule "third_party/pybind11"]
git submodule update
# git checkout 7a19f3b # To run V0.2.3
git rev-parse --short HEAD # 7a19f3b
uv venv ./venv --python 3.11 --python-preference=only-managed
source  venv/bin/activate

uv pip install flashinfer-python
# Find your GPU ARCH here: `nvidia-smi --query-gpu=compute_cap --format=csv`
# This example is for RTX 3080/3090TI and RTX A6000
export TORCH_CUDA_ARCH_LIST="8.6"
# The first inference after startup will be slow as it must JIT compile
# 2025-02-27 12:24:22,992 - INFO - flashinfer.jit: Loading JIT ops: batch_mla_attention_dtype_q_bf16_dtype_kv_bf16_dtype_o_bf16_dtype_idx_i32_head_dim_ckv_512_head_dim_kpe_64
# 2025-02-27 12:24:42,108 - INFO - flashinfer.jit: Finished loading JIT ops: batch_mla_attention_dtype_q_bf16_dtype_kv_bf16_dtype_o_bf16_dtype_idx_i32_head_dim_ckv_512_head_dim_kpe_64

uv pip install -r requirements-local_chat.txt
uv pip install setuptools wheel packaging

# If you have enough CPU cores and memory you can speed up builds
# $ export MAX_JOBS=18
# $ export CMAKE_BUILD_PARALLEL_LEVEL=18

# Install flash_attn
uv pip install flash_attn --no-build-isolation

# ONLY IF you have Intel dual socket and >1TB RAM to hold 2x copies of entire model in RAM (one copy per socket)
# Dual socket AMD EPYC NPS0 probably makes this not needed?
# $ apt install libnuma-dev
# $ export USE_NUMA=1

# Install ktransformers
KTRANSFORMERS_FORCE_BUILD=TRUE uv pip install . --no-build-isolation

# DONE, Continue below!
启动参数:
# R1
python3 ktransformers/server/main.py \
    --gguf_path /model/ \
    --model_path deepseek-ai/DeepSeek-R1 \
    --model_name unsloth/DeepSeek-R1-UD-Q2_K_XL \
    --cpu_infer 68 \
    --max_new_tokens 8192 \
    --cache_lens 32768 \
    --total_context 32768 \
    --cache_q4 true \
    --temperature 0.6 \
    --top_p 0.95 \
    --optimize_config_path ktransformers/optimize/optimize_rules/DeepSeek-V3-Chat.yaml \
    --force_think \
    --use_cuda_graph \
    --host 0.0.0.0 \
    --port 8080

#V3-0324
TORCH_CUDA_ARCH_LIST="8.6" python3 ktransformers/server/main.py \
    --gguf_path /modelv3_new/ \
    --model_path deepseek-ai/DeepSeek-V3-0324 \
    --model_name DeepSeek-V3 \
    --cpu_infer 68 \
    --max_new_tokens 4096 \
    --cache_lens 8192 \
    --total_context 8192 \
    --cache_8bit true \
    --temperature 0.3 \
    --top_p 0.95 \
    --optimize_config_path ktransformers/optimize/optimize_rules/DeepSeek-V3-Chat.yaml \
    --use_cuda_graph \
    --host 0.0.0.0 \
--port 8080运行DeepSeek-V3-0324的推荐设置参考这篇Unsloth的文档